Introduction
Welcome to the Fendous Project Management System! This user manual will guide you through all the features and functionalities of the Fendous platform, helping you manage your projects efficiently and effectively.
Getting Started
1. System Requirements
To use Fendous, ensure your system meets the following requirements:
- A modern web browser (Chrome, Firefox, Edge, Safari)
- Internet connection
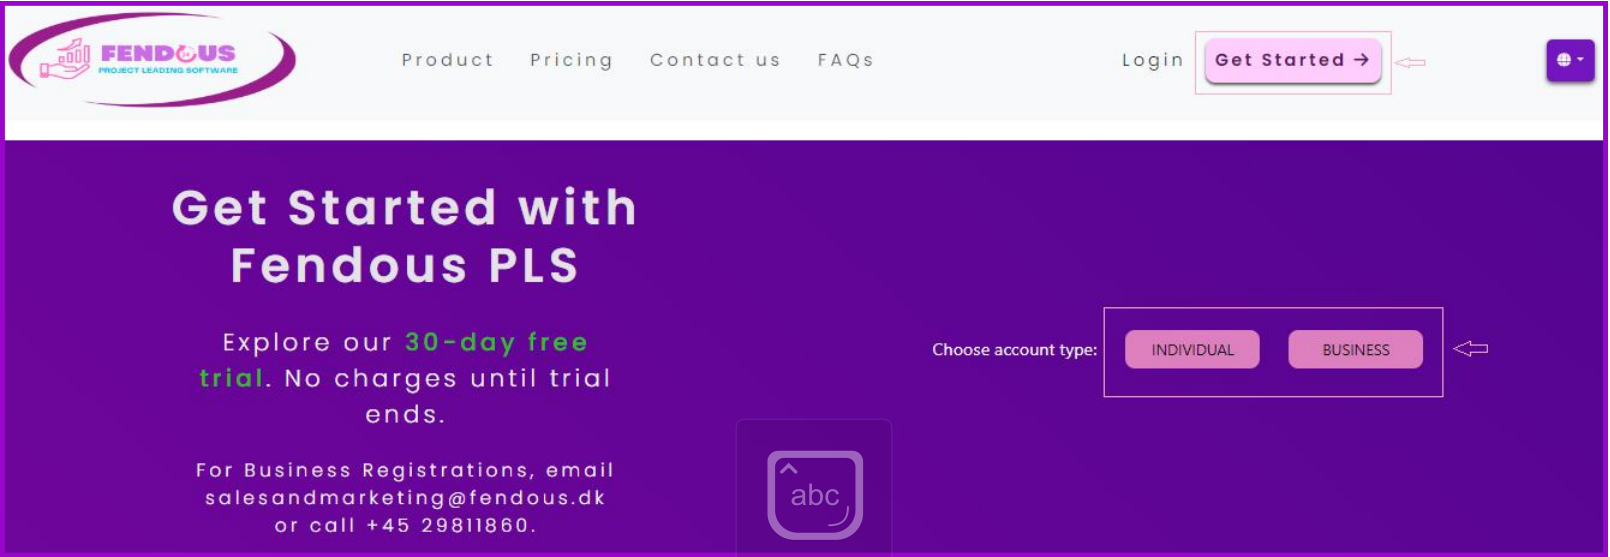
2. Account Creation
- Visit Fendous
- Look for a "Get started" button on the homepage.
- Navigate to either an individual or business account based on your requirements.
- Click on it and fill in the required information, such as your name, phone number, email, and password.
- You will need to confirm the terms of service and privacy policy to log in.
3. Logging In
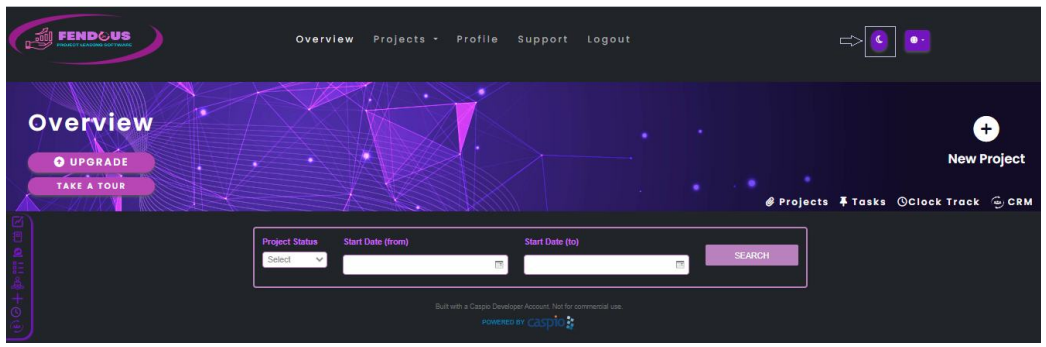
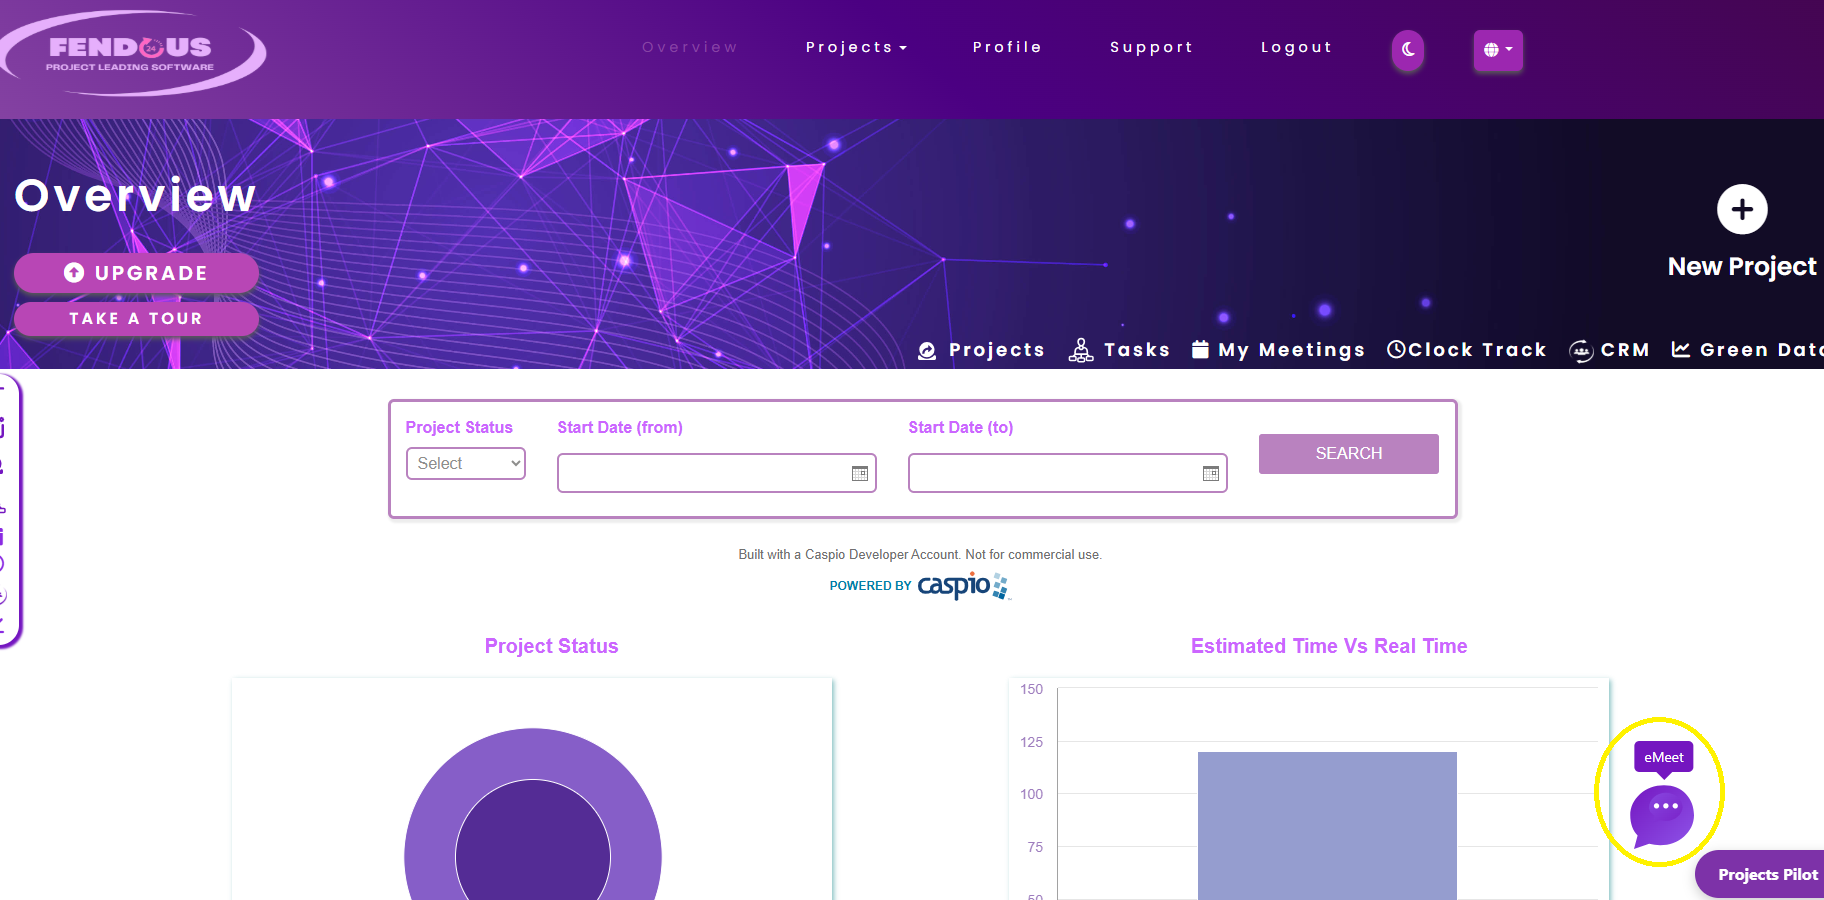
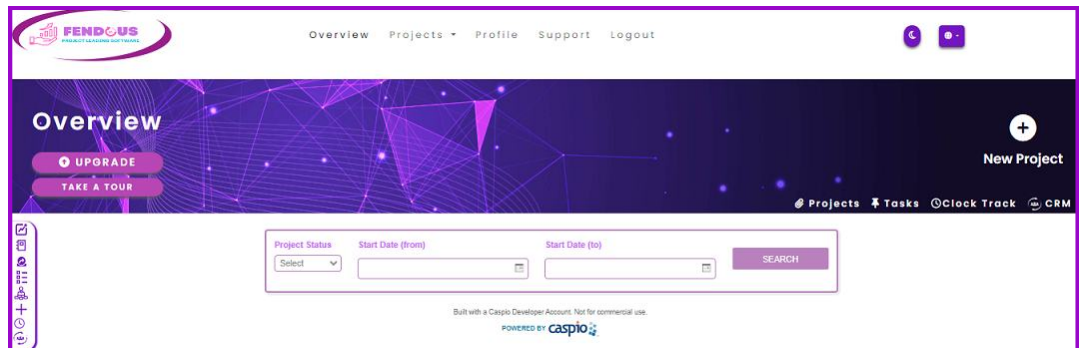
Dashboard Overview
Upon logging in, you will be directed to the dashboard. The dashboard provides a summary of your projects, tasks, and recent activities. It includes:
- Project Summary: Overview of active projects.
- Task Summary: Status of ongoing tasks.
- Profile: User’s Profile, where you can access the registered information and can also update.
- Quick Actions: Shortcuts to create projects, tasks, and messages.
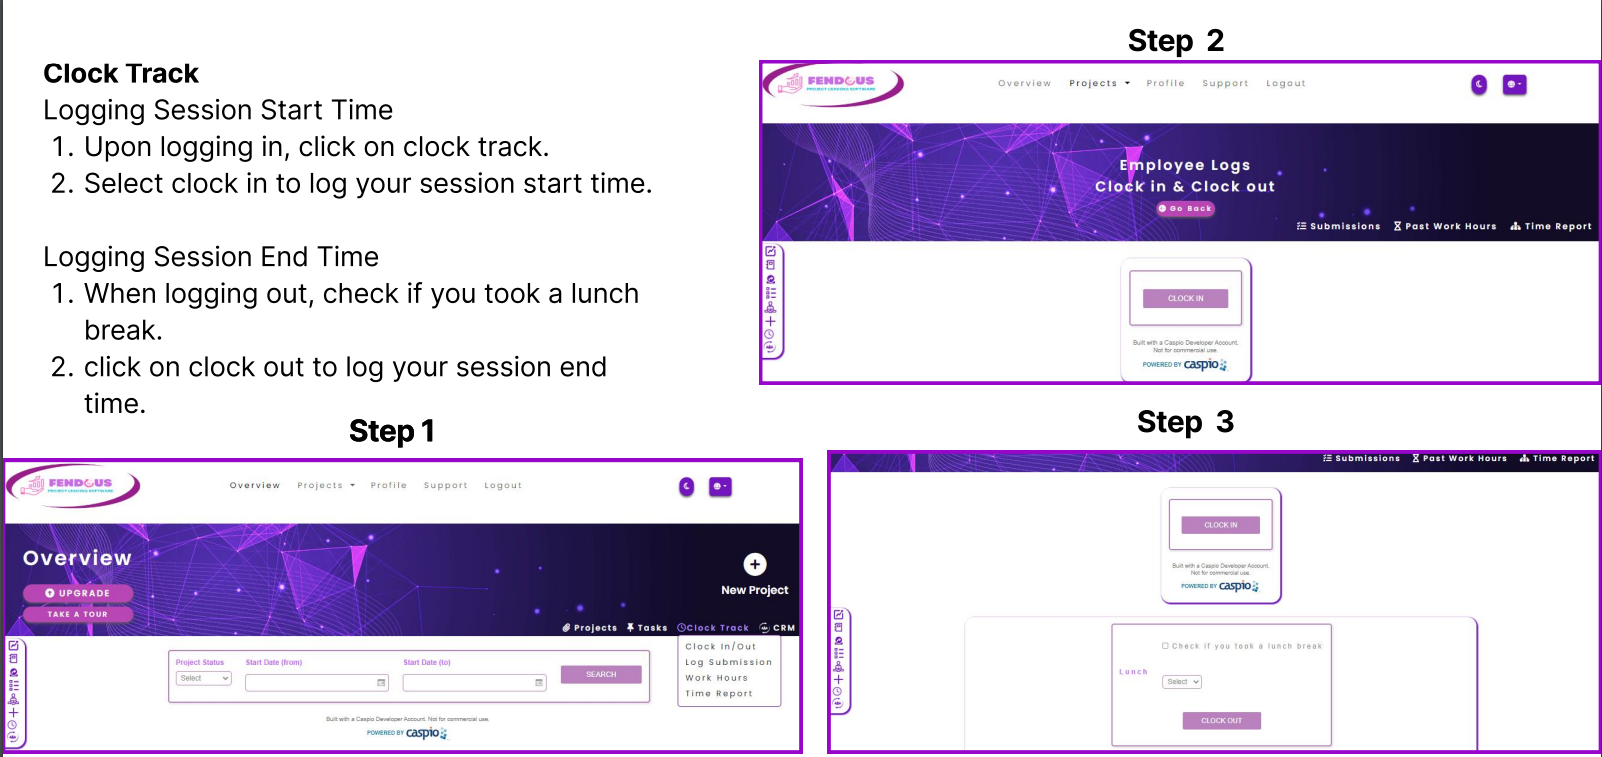
- Clock Track: It keeps a track of login and logout session time.
- CRM: Fendous PLS is integrated with Customer Relationship Management in which a business or other organization administers its interactions with customers.
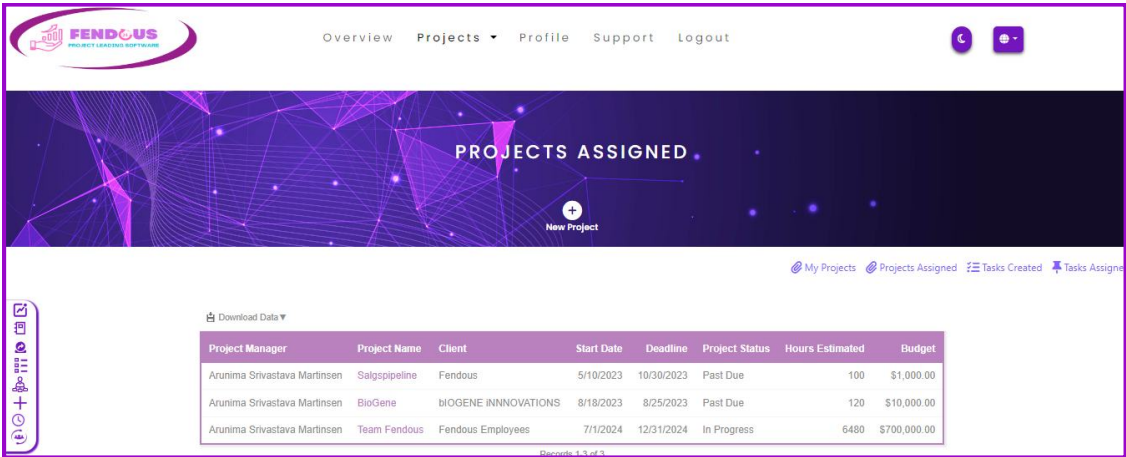
Projects
To manage and view projects:
- Click on Projects.
- Select the project assigned from the dropdown.
- View the projects assigned by another team member.
- Use the quick navigation to Projects Assigned from the submenu bar.
- Click on Download Data at the top left corner of the table to download the projects assigned details.
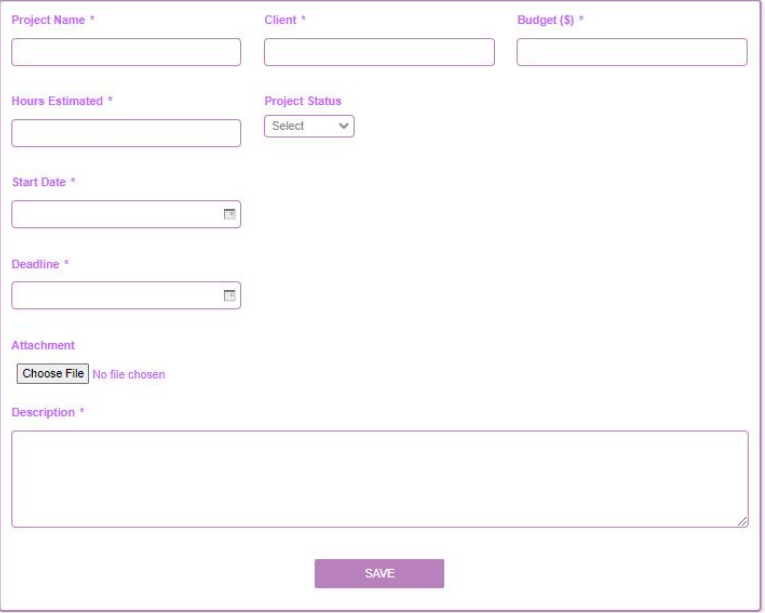
1. Creating a New Project
To create a new project:
- Go to the Projects section from the main bar.
- Click on the New Project button.
- Fill in the required details in the form.
- Click Save.
2. Managing Projects

- In the Projects section, click on "My Projects" to view its details.
- Click on any “Project Name” to view and update the details of the project.
- You can edit project details, add tasks, assign team members, and also track progress from the project overview page.
Managing Project Details
- Edit the information if required and click the Update button.
- Click on Download PDF at the top left corner to download the project details in PDF format.
- You can also add Tasks, members, external members, and meetings, and view the evaluation of the particular project.

Tasks
Adding Tasks
To add a task within a project:
- Go to the Tasks tab within the project.
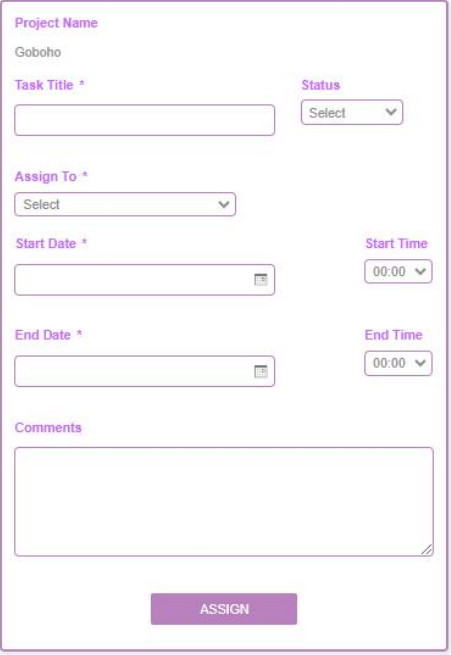
- Click on the plus (+) symbol on the calendar to Add Task.
- Enter the task title, status, assign to, start date, end date, start time, end time, and comments.
- Click Assign.
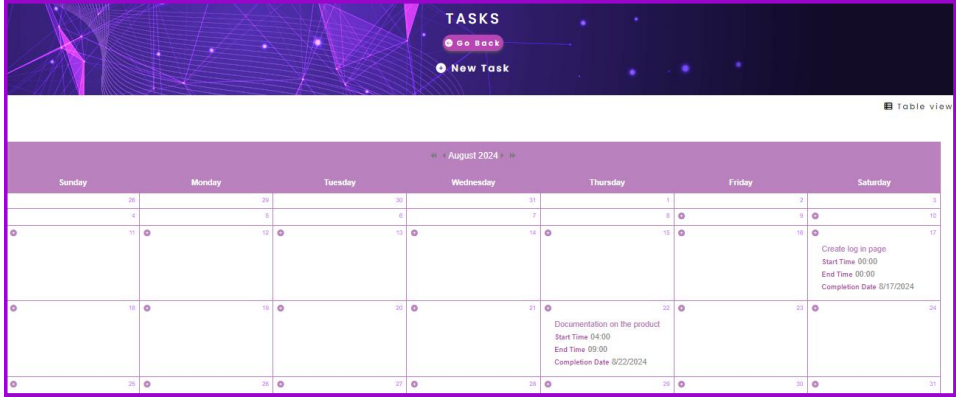
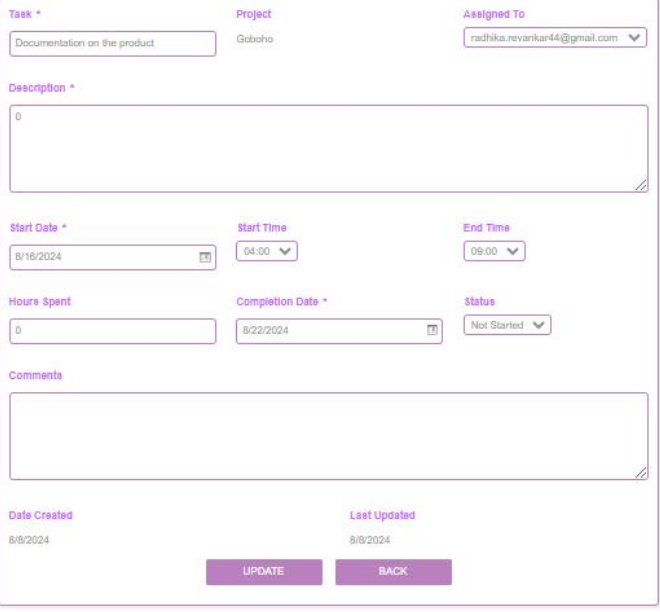
Editing Tasks
To edit a task:
- Click on the task title in the Calendar view.
- Edit the form as required.
- Click the Update button.
- If there are more than one task, scroll to the next page using the navigation at the bottom left corner.
- Download task details by clicking on Download PDF at the top left corner of the form.
- The task can also be deleted by hovering the cursor over the task title on the calendar.
3. Tracking Task Progress
- View task status, deadlines, and hours spent in a graphical representation within a particular project.
- Example: Project Evaluation for Goboho.
Managing Tasks
To access and update tasks:
- Go to Projects.
- Click on My Projects in the dropdown.
- Click on Task Created in the submenu bar.
- Access the tasks created and update changes by clicking the rightmost edit icon of each row.
- Similarly, view tasks assigned.
- Select Project Status, Start date (from), and Start date (to).
- Click on search.
Team Management
1. Adding Team Members
To add or delete team members:
- Go to the Members section from the submenu bar.
- Click Members.
- Add members by clicking on the (+) symbol or delete members by clicking on the (-) symbol.
- Enter the email address of the new member.
- Press Enter to submit.
Managing External Members via CRM
- Go to the External Members section from the submenu bar.
- Click External Members.
- Select Customer Name from the dropdown.
- Click on Search.
- Sort by customer name, company name, comments, or project name.
- Click on Select All or Bulk Edit to make changes to the records.
- Edit the details in the form by selecting the checkbox.
- Click Update.
Schedule Meeting
To schedule a meeting:
- Go to the Meet section from the submenu bar.
- Click Meet.
- Click on the plus (+) symbol on the calendar to Schedule a meeting.
-
Enter the details:
- Meet with: Select a member from the dropdown
- Reason
- Meeting Link
- Start Time
- End Time
- Date
- Duration
- Comments
- Click Save.
2. Assigning Roles and Permissions
Assigning roles and permissions content here...
File Management
1. Uploading Files
- Within a project, go to the Attachments section.
- Click Choose File.
- Select the file from your computer and click Open.
- Upload the file within the project.
Settings
1. Profile Settings
To update your personal information:
- Click on Profile.
- Update your personal information and click Update.
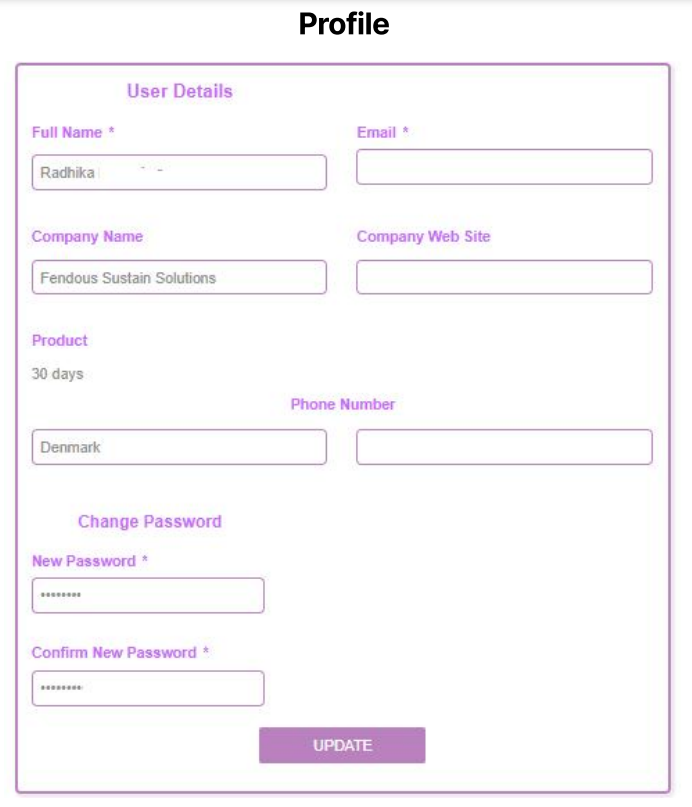
Clock tracking
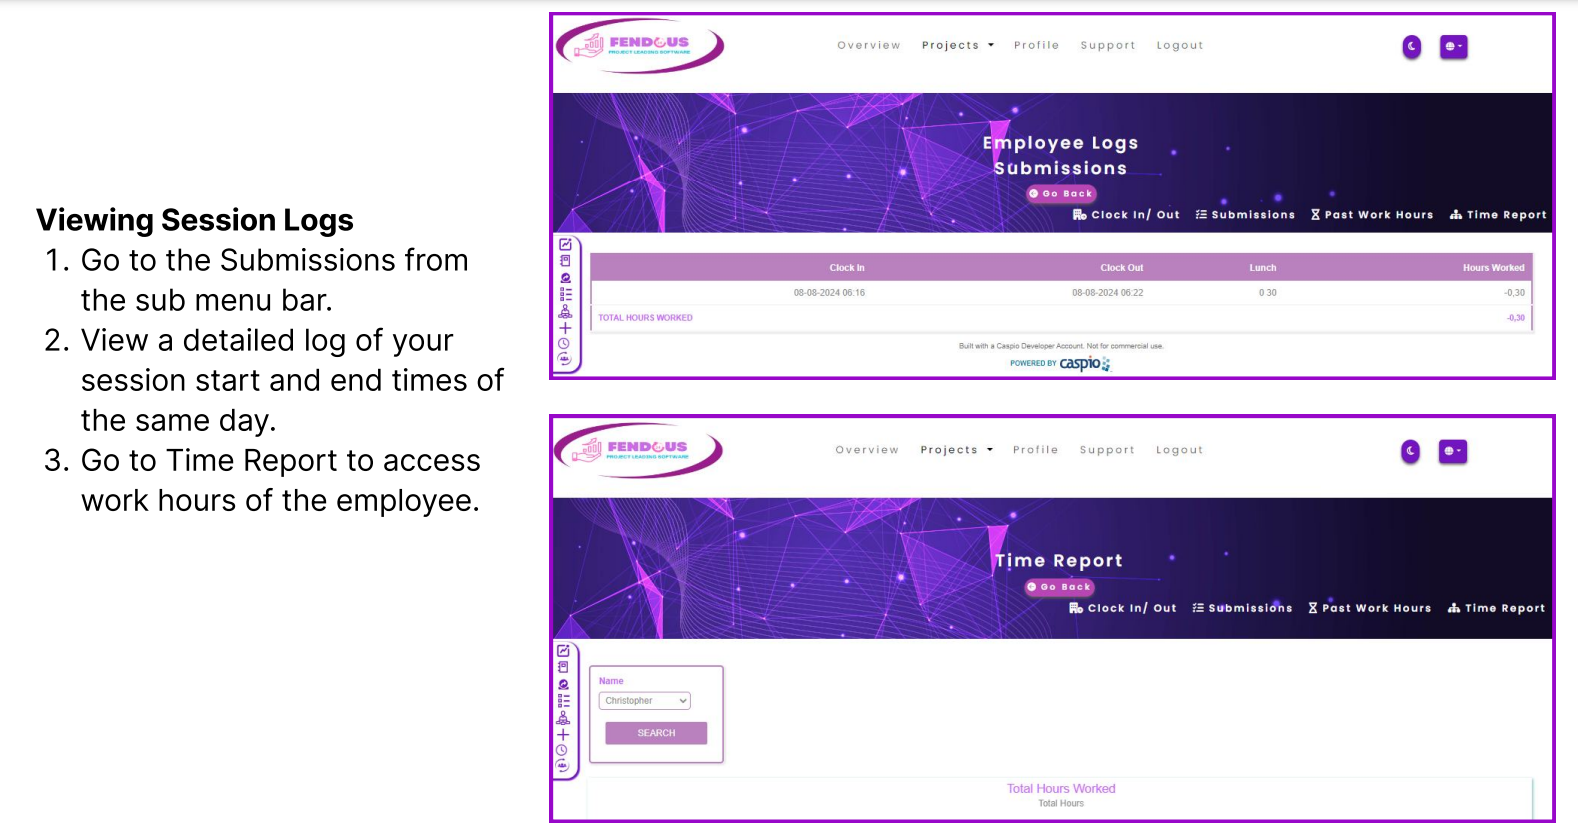
Session logs
FENDOUS AI
Welcome Message: The assistant greets the user with "Welcome to FendousAI!" and identifies itself as the "Virtual Assistant."
Privacy and Disclaimer Notice: There is a notification informing the user that by using the chat, they agree to the collection of personal information (name, email, browser info, and Fendous subscription info). It also mentions that the conversation may be shared with Fendous and a third party for support purposes. A link to the privacy policy is provided.
Agreement Prompt: The user is asked if they agree to the disclaimer with two buttons:
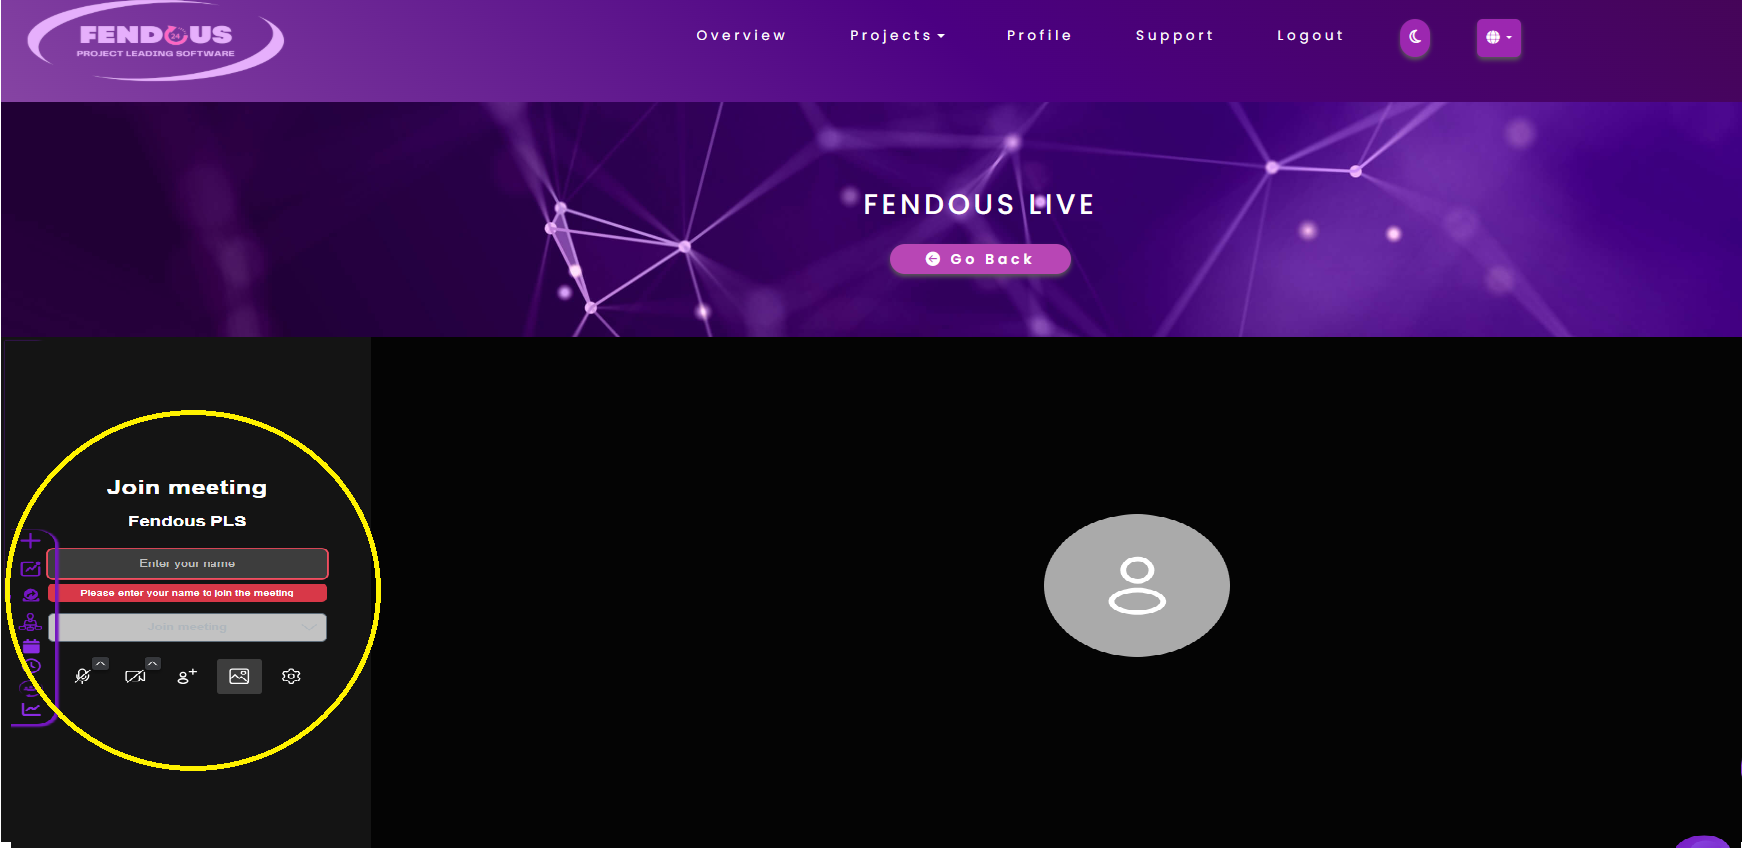
E-meet
The E-Meet feature in Fendous PLS makes it easy for project teams and clients to connect in real time—no external tools needed.
✅ How to get
Step 1
Click "emeet" on the screen (bottom right corner) to get into the "meeting room" page.
Step 2
- Enter your name to launch the meeting space.
- A unique meeting link is automatically generated.
✅ Advantages
1. 🔐 Secure & Integrated
- Hosted within the Fendous environment, ensuring data privacy.
- Each meeting link is temporary and unique to your session.
2. 🔗Invite Participants
- Copy the link and share it directly with your team members or external stakeholders via email, chat, or inside the platform's comment system.
- No login required for participants—just click and join.
3. 🤝Collaborate Live
- Use video, voice, or screen sharing to discuss project updates, resolve blockers, or brainstorm ideas.
- Ideal for quick check-ins, remote stand-ups, or client presentations.
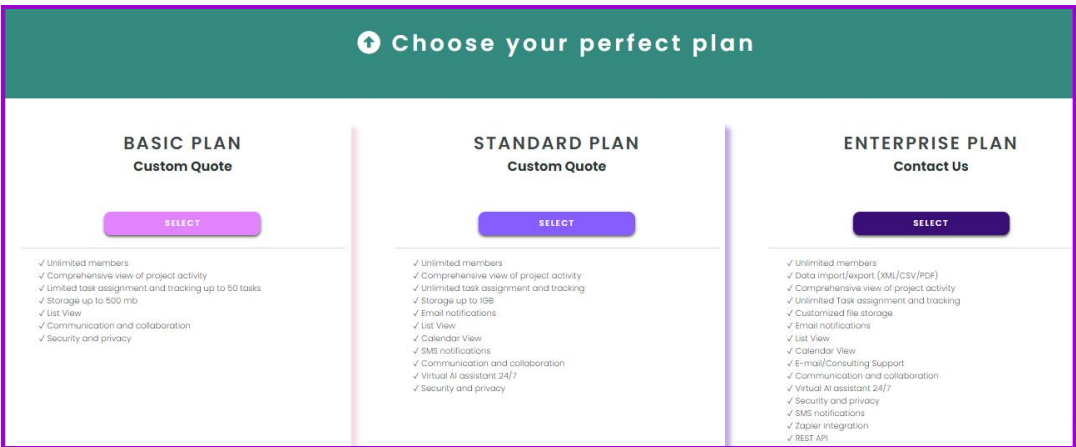
Upgrade
- Click "Upgrade" on the dashboard (top left corner) to navigate to the "Choose Your Plan" page.
- We offer three plans: Basic, Standard, and Enterprise. The Basic and Standard plans are available with custom quotes, while the Enterprise plan requires contacting a manager for details.
User Interaction
The assistant asked the user to confirm their name. The user responded by typing "Anisha."
The assistant then requested Anisha’s email address. Anisha provided the email address: "anisha@gmail.com."
The assistant thanked Anisha for providing the email and asked what assistance was needed.
Action Buttons
Below the conversation, four buttons are visible, offering different options for further interaction:
The text input field at the bottom remains for further user interaction.
The interface is focused on guiding the user through steps to obtain assistance, confirming details like the user's name and email, and then offering several options for further actions. The design remains consistent, with a clear, user-friendly layout.
Take a Tour
- Click on TAKE A TOUR at the top left corner of the dashboard overview page.
In this tour, you'll learn how to create projects, assign and manage tasks, and oversee the entire project lifecycle efficiently. We will guide you step-by-step through setting up your projects, organizing tasks, and using the tools provided to streamline project management. By the end, you'll have a comprehensive understanding of how to utilize the system to its fullest potential.